Optimization and Scaling
Glissez pour afficher le menu
Tracking & Analytics with Meta Pixel
Meta Pixel is a small piece of code that tracks user behavior on a website after interacting with ads. It provides the data needed to optimize campaigns, retarget users, and improve ROI.
Key functions:
- Track actions: page views, add-to-cart, purchases, sign-ups;
- Measure conversions: see which ads generate results;
- Build audiences: segment by user behavior for retargeting or Lookalikes.
Setup process:
- Create Pixel in Ads Manager;
- Install manually, with Google Tag Manager, or integrations (Shopify, WordPress);
- Define events (standard or custom);
- Verify with Meta Pixel Helper.
Pixel enables smarter optimization, ads are delivered to users most likely to take action, boosting efficiency and revenue.
Meta Pixel and UTM Tracking
Before running Meta ads, it's essential to set up proper tracking to understand what users do after clicking your ad. Let's see how to install the Meta Pixel and create UTM-tagged URLs so you can track conversions and traffic sources accurately.
First, you'll create your Pixel in Events Manager by selecting "Connect Data", choosing "Web", naming your Pixel and connecting your website.
Pixel + UTM work together: Pixel tracks user actions, UTM shows traffic source in analytics.
Once created, let's install it on your website.
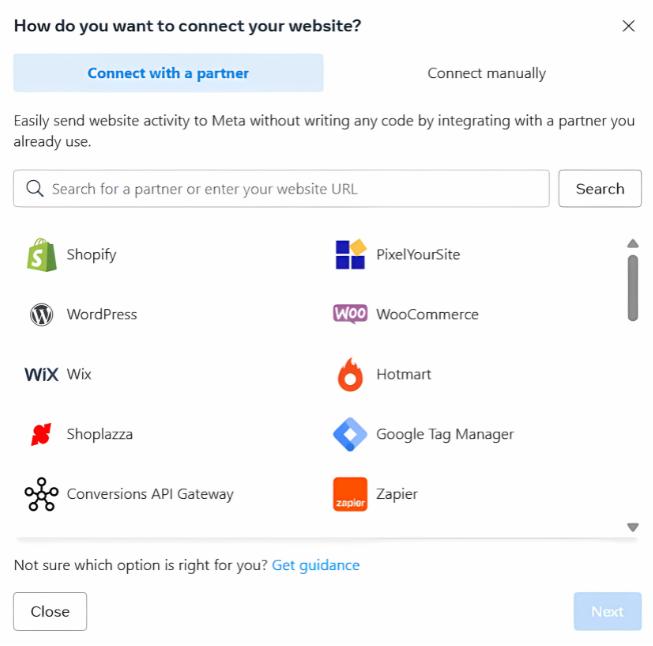
Option 1: Partner Integration
If you're using platforms like Shopify, WordPress or any other possible partner integration:
- Choose your partner;
- Follow the instructions to connect the pixel, usually this is as simple as pasting your Pixel ID into a plugin or integration field.
If you're using WordPress, for example:
- Click on "Plugins", then "Add New", then search for and choose "Facebook for WordPress";
- Click on the "Connect with Facebook" link that will direct you to the Business Manager.

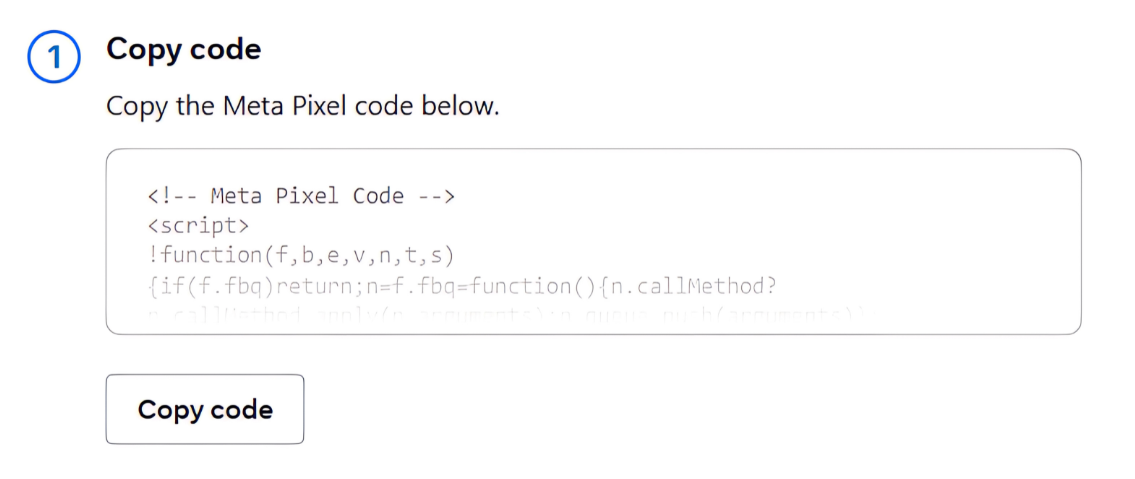
Option 2: Installing Manually
1. Choose "Install code manually";
2. Copy the Pixel base code.
It'll look something like this:
A/B Testing & Optimization
A/B testing is one of the most effective ways to improve Meta Ads. It allows advertisers to compare variations and use real data instead of guesswork.

What can be tested:
- Audiences: Lookalike vs. interest-based to find higher converters;
- Creatives: video vs. carousel vs. static images. Test headlines, CTAs, colors;
- Placements: Stories vs. Feed vs. Marketplace vs. Messenger. Automatic placements can reveal high-performing channels.
After your test runs, you'll analyze the results and optimize your campaign by scaling up the winning variation and pausing or tweaking the others. This ongoing process not only boosts performance, but also ensures that your ads stay relevant, engaging, and cost-effective over time.
By regularly running A/B tests, you can refine your strategy with confidence, improve return on ad spend (ROAS), and make every decision backed by real performance data.
A/B testing is only a surface-level check, not a final conclusion. Early differences between variants don't mean anything without statistical significance and enough traffic. Closing a test too soon is a common mistake—short-term fluctuations or random spikes can easily create the illusion of a "winner". Only after the test reaches the required sample size, runs through a full user cycle, and achieves statistical confidence can the results be considered reliable.
Monitoring and Adjusting Live Campaigns
Once your ad is live, continuous monitoring and optimization ensure you don't waste budget.
Performance Tracking:
- Check reports daily, but wait 5 days before making changes to gather reliable data;
- Use Customize Columns in Ads Manager to focus on key metrics.
Key Metrics:
- CTR (Click-Through Rate): aim above 1%;
- CPC (Cost Per Click): keep affordable and sustainable;
- CPR (Cost Per Result): evaluate against campaign goals;
- ROAS (Return on Ad Spend): above 2.0 is ideal;
- Conversion Rate: shows if clicks turn into actions (low rate may indicate landing page or CTA issues).
Advanced Scaling Strategies
Scaling helps grow winning campaigns without overspending or losing performance.
When to scale:
- ROAS above 2.0;
- CPA (Cost per Lead/Acquisition) within goal (e.g., <$1);
- CTR above 1%.
Start with vertical scaling by increasing your daily budget by 20–30% every few days. For example, if you're spending $5/day, raise it to around $6.50 and monitor results. If performance stays good, keep scaling. If costs go up or leads drop, pause and rework your targeting or ad creative.
These benchmarks are general guidelines. The exact "healthy" ROAS, CPA, and CTR vary widely across niches, product types, audience sizes, and price points, always interpret them in the context of the specific industry.
Also, watch for ad fatigue. If your CTR drops or your ad frequency goes above 3.5, it's a sign that people are seeing your ad too often. Refresh your creative by changing the video, headline, or approach to keep it engaging.
Next comes horizontal scaling. This means duplicating your best-performing ad set and targeting new audiences. For instance, if your current audience is young musicians, try targeting music producers, indie label owners, or fans of independent artists. This way, you expand without relying on just one group.
To make scaling even smarter, use Campaign Budget Optimization (CBO) / Advantage Plus (as Meta is calling it now). Set a total budget (like $30/day) and let Meta automatically distribute the money to the best-performing ad sets.
Retargeting & Nurturing Leads
Retargeting Campaigns:
- Target users who visited site, clicked ads, or engaged with social media;
- Build Custom Audiences in Ads Manager;
- Use Meta Pixel to track site visitors;
- Show dynamic product ads (items viewed, cart abandoners, testimonials).
Lead-Nurturing Funnel:
- Start with valuable content (free ebook, video);
- Retarget with stronger ads (discounts, testimonials, demos);
- Push conversion with clear CTAs ("Shop Now", "Claim Your Offer").
Email & SMS Marketing:
- Collect contacts via forms/opt-ins;
- Send welcome email with content + exclusive offer;
- Use follow-up sequences to maintain engagement and build trust.
1. What is the main purpose of the Meta Pixel?
2. What is the main benefit of A/B testing in Meta Ads?
3. Which of the following is an example of a creative test?
4. What is the main goal of a lead-nurturing ad funnel?
Merci pour vos commentaires !
Demandez à l'IA
Demandez à l'IA

Posez n'importe quelle question ou essayez l'une des questions suggérées pour commencer notre discussion
